Weaving in loose ends, the final step in completing a project! My least favorite part of the process. Some knitters work in tails as they go - me, I put it off until I absolutely have to do it.
I am not too particular with this part of the process, but others are. Look around, and you will see many different ways knitters weave in their tails. For instance, Purl Bee has some excellent weave in methods - I am just usually too lazy to be so particular.
Here is how I do mine - usually with a crochet hook, I just weave in and out along the cast on and bind off edges. If I am feeling ambitious, I will break out the yarn needle and carefully weave along the stitch pattern. Other times, I will just weave along the edge as I would with a crochet hook. Sometimes, I work right under the edge. Any way you do it, if it looks good to you, then don't worry about it. There is no wrong way to do it :0)
If you have never knit from a chart, or are afraid of charts - I encourage you to at least give it a try! It really isn't hard at all. When I first started knitting, I stayed far away from anything with a chart. However, one day I decided to try, because I really wanted to knit a shawl, but the pattern was only charted. Turns out, there was nothing to be afraid of, and I found that I actually like knitting from charts.
In this video, I will go over two charts - what they look like, symbols, and how to decipher them. This is just a guideline which can be used for lace charts, color charts, flat knitting, and just about any knitting chart out there. I do want to say that it is important to read all of the information that comes with your pattern, so you know how to interpret the chart and especially what the symbols in your chart mean. Not every designer will use the same symbols to mean the same thing. This video will show you how most charts are typically set up to work - but again, make sure you read through your pattern completely since there could be a particular way the designer intends the chart to be read.
I will also knit a small piece of lace in the video using the first chart. You can get the chart below if you would like to try working from a chart. I promise, it is really easy, even if you have never knit from a chart before.
The sample in the chart is for Fern Leaf Lace. You will need to know how to make the following stitches:
knit
purl
sk2po (slip a stitch knitwise, knit 2 together, pass the slipped stitch over the k2tog)
skpo (slip a stitch knitwise, knit 1, pass slipped stitch over the knit stitch)
k2tog (knit next 2 stitches together as if they were one)
yo (yarn over)
If you don't know how to do any of the above, I have videos for all of them on my YouTube Channel. Check the Knitting Basics and Beyond the Basics Playlists for these videos.
I thought it would be fun to do a knit along for a quick, easy project. Nothing is quicker or easier than a dishcloth! This will also give you a chance to use up some of that Lily Sugar'n Cream cotton you have. I know I can't be the only one with way too much of that stuff ;0)
Here is how the knit along will work. Each week, I will be posting a video and written instructions right here for ten rows of the pattern. I will just keep adding to this post instead of making a new post. That way it will all be in one place. You will see me knit the entire thing, from cast on to bind off. Every single stitch!
The first video is just going to show you what you will have at the end of the knit along, and the materials you will need to complete it.
Let's get started!
Materials: One 2 oz. ball of Lily Sugar'n Cream Cotton Yarn (you will only need about 1.1 oz total, so feel free to use scraps if you have them instead of a new ball) US size 8 needle Yarn or tapestry needle or crochet hook for weaving in the loose ends
That's it. Next week, we will cast on!
APRIL 10, 2013 - PART ONE
Here is the first part of the pattern. There is a video as well, showing all of the steps beginning with the cast on.
NOTE: The first and last two stitches of each row are to be knit. This is not included in the instructions below to avoid repetition.
Cast on 40 stitches
Knit two rows for set up
Begin pattern:
(Row 1 is the Right Side)
Rows 1 and 2: *K6, P6*
Rows 3 and 4: *P1, K5, P5, K1*
Rows 5 and 6: K1, P1, K4, P4 *[K1, P1] twice, K4, P4. Repeat from * to last two sts, K1, P1
Rows 7 and 8: P1, K1, P1, K3, P3 *[K1, P1] three times, K3, P3. Repeat from * to last 3 sts, K1, P1, K1
Rows 9 and 10: [K1, P1] twice, K2, P2 *[K1, P1] four times, K2, P2. Repeat from * to last 4 sts, [K1, P1] twice
That does it for the first part of our Knit Along. Come back next Wednesday for Part Two. Here is the video. Happy Knitting!
APRIL 17, 2013 - PART TWO
Part Two of the Knit Along
**Remember, the first and last two stitches of each row are to be knit. This is not included in the instructions below.**
Rows 11 and 12: *P1, K1*
Rows 13 and 14: *K1, P1*
Rows 15 and 16: [P1, K1] twice, P2, K2 *[P1, K1] 4 times, P2, K2. Repeat from * to last 4 sts, [P1, K1] twice
Rows 17 and 18: K1, P1, K1, P3, K3 *[P1, K1] 3 times, P3, K3. Repeat from * to last 3 sts, P1, K1, P1
Rows 19 and 20: P1, K1, P4, K4 *[P1, K1] twice, P4, K4. Repeat from * to last 2 sts, P1, K1
That does it for the second part of our Knit Along. Come back next Wednesday for Part Three. Here is the video for this part of the dishcloth. Happy Knitting!
APRIL 24, 2013 - PART THREE
**Remember, the first and last two stitches of each row are to be knit. This is not included in the instructions below.**
Rows 21 and 22: *K1, P5, K5, P1*
Rows 23 and 24: *P6, K6*
Rows 25 and 26: *P5, K1, P1, K5*
Rows 27 and 28: *P4, [K1, P1] twice, K4*
Rows 29 and 30: *P3, [K1, P1] three times, K3*
That is is for the third part of the Knit Along. Come back next Wednesday for Part Four. We are heading toward the finish line! Here is the video. Happy Knitting!
MAY 1, 2012 - PART FOUR
**Remember, the first and last two stitches of each row are to be knit. This is not included in the instructions below.** Rows 31 and 32: *P2 [K1, P1] four times, K2* Rows 33 and 34: *P1, K1*
Rows 35 and 36: *K1, P1*
Rows 37 and 38: *K2 [P1, K1] 4 times, P2*
Rows 39 and 40: *K3 [P1, K1] 3 times, P3*
That wraps up Part Four. Next Wednesday we will finish up - knit the last few rows, bind off, and weave in our loose ends. Here is the video for Part Four. Happy Knitting!
MAY 8, 2013 - PART FIVE
**Remember, the first and last two stitches of each row are to be knit. This is not included in the instructions below.**
Rows 41 and 42: *K4, [P1, K1] twice, P4*
Rows 43 and 44: *K5, P1, K1, P5*
This completes the pattern repeat.
Rows 45 and 46: Knit all stitches
Bind off and weave in loose ends.
Here is the video for the last part of the dishcloth. We're all done!
At long last, here is the second part of the Entrelac tutorials - Seamless Entrelac!
Below you will find a printable guide that you can use to create your own seamless entrelac projects. There is also a video on the technique.
This tutorial on seamless entrelac is intended for those knitters who already have an understanding of entrelac. If you need further instruction on entrelac basics, you can find my other tutorial HERE.
Seamless Entrelac is really the same as when worked flat, except you don't need to knit the side triangles. This means, if you already have a grasp on entrelac, then working it in the round will be a snap. When starting, it looks as though you will be working flat, and you may wonder how it will turn into seamless entrelac. Your fabric will not be joined until you work the last Right Leaning Rectangle.
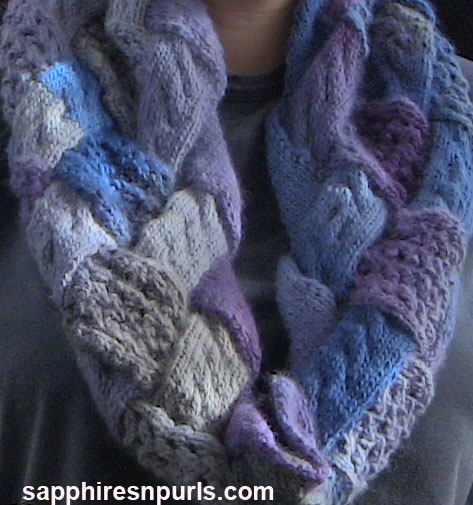
The photo above shows the Cables and Lace Entrelac Cowl. The pattern is available only on Craftsy. Click the picture below to go to Craftsy to purchase the pattern. SORRY, PATTERN IS NO LONGER AVAILABLE. The lace stitch used in the cowl is Cat's Eye Lace, and the cable stitch is my own (although it is so simple, I am sure it has been done many times over by others).
Click HERE to go to Scribd to download the tutorial if the embedded document below isn't working.