Showing posts with label knit. Show all posts

Saturday, September 29, 2012

The Woolly Lamb, East Aurora, New York

The Woolly Lamb, 712 Main Street, East Aurora, NY
I visited this store on September 21, 2012.  The hours listed say the store was to open at 11 AM.   Believe me, I was there on time.  However, the owner (or whoever she was) was NOT!  So I decided to sit on a bench nearby for about ten minutes, and was going to leave if the store was not open by then.

It was!

I was greeted upon entering - as I would expect, so that was nice.  Some places do not do this, by the way.

My first impression of the store was that it was a bit on the sloppy side.  There were some areas where the yarns were piled on top of each other and in boxes and bags.  Nothing wrong with having extra in the bags, but it is nice to see them stacked nicely in my opinion.  I like to see a knitting shop that is neat and organized because it makes finding what I want much easier; also if a yarn is new to me, I am much more likely to check it out if I don't have to dig underneath another bag of yarn to get to it.

The shop has an excellent selection of yarn and a pretty nice selection of notions.  The woman who was there was very friendly and helpful.  I witnessed great treatment to another customer who had come in after me.  She was looking for a certain yarn that she had purchased before, but didn't have the ball band or something like that, and the shop lady was helpful in trying to find it for her.  I also heard the customer ask what time the store opened, and the shop lady said 11 but that she was often late.

This late bit I find kind of a bad business practice, but hey.  It isn't my store.  I am sure there usually isn't a line waiting for the place to open, however if your hours are 11 to whenever, then you should be there at that time.  I was ready to leave, and she would have missed out on my purchase.

At any rate, despite the few negatives I mentioned above, I would definitely go back to this store.  Good customer service far outweighs opening a few minutes late and being a little bit messy.  If you are in the area of East Aurora NY, I recommend stopping by The Woolly Lamb.  I even got an ink pen :0)


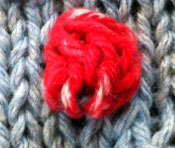
My purchase?  I got some Sublime angora merino - it was on sale!  So absolutely soft and wonderful, I can't wait to start knitting with it.

Below are a few pictures of the store, and the yarn I got.


Monday, September 10, 2012

Knit a Triangle Shawl (Bottom Up)

One of my first knitting projects was a triangle shawl.  I've always loved shawls, and couldn't believe how easy it was to knit one.

There are many ways to knit a triangle shawl.  This time, we are going to cover going from the bottom up using yarn overs to make the increases.  I also show doing a KFB (knit front and back) increase if you want a less obvious increase.

This is just the bare bones of triangle shawls.  I am sure you have seen many beautiful shawls that are lacy, some that are cabled, and many others.

The shawls pictured here were knit years ago.  I am not certain what yarn was used.  I think the one on the right is Caron Simply Soft, but it could very well be something else.

Below are a few examples of how to do a simple triangle shawl.  Nothing fancy here.  A shawl is a great beginner project if you want something larger than a scarf, but still want to keep it simple.  You don't have to worry about gauge either.

These shawls are also a great project for seasoned knitters, because you can sit and watch TV and just mindlessly knit.

You can use any yarn and needles you like - the needles should be circulars though, to accomodate all of the stitches as the shawl grows.  I'd say you want a 32 inch minimum.  Of course if you are using a thin, lace weight yarn you could probably get away with a 24 inch circular; if you are using a thicker, bulkier yarn you may need to use a longer needle.  

A good place to start is go to the craft store or your LYS, find a yarn you like, and just swatch using the needle size recommended on the ball band.  If you find that you want a looser fabric, try a larger needle; if you want a denser fabric, go down a needle size.  There is no wrong way to do this, so don't be worried that you may be using the wrong needle for your yarn.  If you are pleased with your swatch, then you are using the right yarn and needles.

My shawls pictured above are just garter stitch, as are the samples in the video.  You can do garter stitch if you like, or stockinette - maybe even alternate a few rows of garter with a few rows of stockinette.

Below are only a few ways you can do a bottom up triangle shawl.  If you don't like any of these looks, play around and see what you can come up with.  I used a US size 10.5 Knitter's Pride Cubics needle in my samples, and the first three were done in Mulberry Merino yarn, and the last in Paton's Classic Wool.

The first sample is a mini shawl from cast on to bind off.  Yours of course will be much bigger.
Cast on 3 stitches
Knit across, turn
K1, YO, knit to end

Repeat the K1, YO, knit to end until the shawl is as big as you want it to be.  Bind off, weave in loose ends and block if you like.


The second sample is done by making the yarn over at the beginning of each row.  This makes a very decorative edge along your shawl.
Cast on 3
Knit across, turn
YO, knit to end
Repeat from YO, knit to end until shawl is desired size


Our third sample also uses a yarn over increase, and will create a wider border than either of the two above.  This also gives a less pointy tip to the shawl.
Cast on 5
Knit across, turn
Knit 3, YO, knit to end
Repeat from Knit 3, YO, knit to end until shawl is desired size


Maybe you don't like the look of yarn overs.  You can do any increase you like and are comfortable with.  In my sample below, I used the KFB increase - knit front and back of the stitch.

Cast on 3
Knit across, turn
K1, KFB, knit to end
Repeat from K1, KFB, knit to end until shawl is desired size


Here is a video showing how I did all of the samples.  I hope this helps those of you thinking about making a triangle shawl, but aren't quite sure where to start.


Monday, September 3, 2012

Autumn Acorn Cowl

My favorite time of year is fast approaching - Autumn!  I love the smells, the colors, and the crisp feel of the air.

I designed a cowl for my favorite time of year that uses the Acorn Cable Stitch, and a yarn that reflects the colors of fall.  You can use any color you choose, of course!

The yarn I used can be purchased here:
http://www.herrschners.com/product/Lighthouse+Waves+Yarn+1.aspx


The pattern can purchased and downloaded here:

Tuesday, August 14, 2012

Knitting With Plastic Bags

Pattern for the Chilly Coaster is below


Hey everyone!  I have been wanting to do this tutorial for ages, and finally got around to it!  Below is the tutorial and video, and a free pattern for my Chilly Coaster, made from plastic grocery bags.  I call it Chilly Coaster, because it is meant for cold cups.  Also, this coaster is just for fun, not really to keep condensation from getting on your table.  So be warned, don't use this thinking it will protect an important surface.  And while you could use it for a steamy, hot mug of coffee, also know that the plastic may melt, leaving a nasty mess on your cup.  So, cold drinks only on water safe surfaces.

First, here is the video.  Below that you can print the tutorial if you wish, and the pattern.  Happy Knitting, and Enjoy!


Knitting With Plastic Bags Tutorial


Chilly Coaster Pattern

Saturday, June 30, 2012

How to Knit Entrelac: An Entrelac Tutorial

At long last, here is the tutorial on Entrelac!  Below you will find a printable guide, with which you can knit a small sample of entrelac fabric.  When you feel comfortable with entrelac, you can use the directions here to create your own project.  Just substitute the number of stitches in the sample for however many stitches you want to use.

There is also a video demonstrating the small sample you can knit with the entrelac guide.  The video is in two parts, each about half an hour long.  I show the sample knit from cast on to bind off - how to knit the base or foundation triangles, the right side triangles/rectangles, the left triangles and wrong side rectangles, and finally the bind off triangles.

This tutorial is for knitting entrelac flat.  I also have a tutorial for Seamless Entrelac / Entrelac in the Round HERE.


This tutorial is just bare bones entrelac; there are many creative ways to expand on the basic entrelac I show you here.  As I mention in the guide, there are a couple of books on Entrelac that I know of (the first one I have), and a Craftsy class on Entrelac.  Here are the links:


Entrelac: The Essential Guide to Interlace Knitting


HERE is the class on Craftsy, taught by Gwen Bortner


And here are the two videos:


Wednesday, June 27, 2012

How to Knit Bobbles


I have recently started redoing all of my old videos.  Bobbles is one of those videos.  It was long and extremely boring, on top of being pretty hard to see.  This new video is still a tad on the long side, but at least now it is very clear!  And instead of written instructions scrolling through the video, I am putting them up here.  Hope everyone likes the new bobble video!


There are no set rules for bobbles, really.  You can make as many as you want, big or small, different colors (as in the photo above), and they can be placed anywhere you like.  If you are following a pattern, it will undoubtedly tell you where to place the bobbles, and how to make them.  

Below are a few ways I know to make bobbles, and I am sure there are more methods floating around out there. They all have a slightly different look, but the method of making them is really the same : increase into the next stitch, turn and purl, turn and knit, decrease.  And there is your bobble.  The typical bobble is 5 stitches, but you are free to experiment.  The video demonstrates stockinette fabric and bobbles, but you can really do anything with them.  Maybe garter fabric with a stockinette bobble, or the other way around.  Why not a seed stitch bobble?  Use bobbles as buttons.  Your only limitation is your imagination.

Decide where you want a bobble.  Into the next stitch, increase using any of the following methods:

1) K1, P1, K1, P1, K1

2) K1, YO, K1, YO, K1

3) KFL, KBL, KFL, KBL, KFL (Knit front/back loop)

Then, turn your work and purl those same five stitches.  Turn again and knit.  You can stop here, or purl/knit again.  The more times you do this, the puffier your bobble will be.

Now, you need to decrease back to one stitch, using any of the following methods:

1) Pass second stitch over first, pass third stitch over first, etc. until all extra stitches have been passed over the first

2) After you have purled and are ready to knit the stitches : K2tog, K1, K2tog, then pass the two remaining stitches over the first

3) Pass the second and third over the first together, then pass the fourth and fifth together over the first

4) Once you have purled/knit as many times as you like, continue knitting to the end of your row.  You will make your decreases on the wrong side of the fabric.  When you come to the bobble, simply purl all of the extra stitches together.  Obviously, this could become difficult if you have chosen to use more than five stitches for your bobble.  I wouldn't recommend this decrease for more than five stitches.  


And of course, here is the video!  Happy Knitting and Enjoy!


Friday, June 22, 2012

New Knitting Videos and Tutorial

Happy Friday everyone!  For those who don't follow me on Facebook, or maybe just didn't see the post, I have decided to redo all of my old knitting videos.  I have been making how-to videos since early 2008.  It is going to take a while to get them all done!  At the beginning, I only had a digital camera to record with.  The camera would record for 3 minutes and then stop.  So in addition to poor quality video, there were many stops and starts in the videos.  Not long ago, I got a real video camera! I am now able to record clear, HD videos from start to finish.  If you are familiar with my videos, I'm sure you noticed the difference!  I have also been playing around with different editing music, etc. on the videos trying to decide what I like best.  I think I finally have a format that works well and most people seem to like.  I will be adding these videos on the weekends, along with the regular stitch videos that I do.

So.  I have added a new tab to the top of the blog which will have links to all of my videos.  Not all of them are available right now.  It is going to take time for me to redo everything; I will be adding the links as I go.  The videos are not being done in any particular order.   Also, all of the stitch pattern videos I have done in the past will be going into a new tab on The Weekly Stitch.

I have also finished my entrelac project that I will be giving away as a free pattern to go with the tutorial.  I hope to have that up this weekend.

Hope everyone likes the new videos and tutorial.  Thanks for visiting my blogs.  Happy Knitting!

Saturday, June 16, 2012

How to Make a Tassel

Tassel on the left was made with some wool yarn I dyed myself.  Tassel on the right was made with Sugar n Cream cotton yarn.


Tassels are easy to make.  You don't need any fancy equipment, either.

You will need:
  1. A piece of cardboard or something else you can wrap your yarn around.  It should be a little longer than you want your finished tassel to be.  That way you can trim up the end without having a shorter than desired tassel.  (I used a piece of folded cardboard to make mine, as you will see in the video, but you needn't fold yours. )
  2. Scissors
  3. Crochet hook
  4. Yarn, of course

To keep things brief here, I am not going to go into great written detail.  Not that it is complicated to make a tassel, but it is much easier to see it being done than read how to do it.   Basically, all you do is wrap your yarn around the cardboard, until the tassel is as thick as you want it.  The more wraps you do, the thicker your tassel will be.  Then, cut a length of yarn, slip your crochet hook under the wraps, pull the length of yarn under them, and tie it a couple of times tightly so that the tassel doesn't come apart. These are the strands you will use to attach the tassel to your project.  Next, cut the wraps on the opposite end from where you tied them together.  The tassel can be used as is, or you can cut another length of yarn, and tie it around the tassel a short distance from the top.  You can see in the picture above where I have tied my tassels.  I like to wrap my yarn a few times around the tassel, but you can just tie and be done.  With your crochet hook, pull the tails from the yarn you used to tie around the tassel underneath itself and voila. Trim if necessary.  To attach your tassel to a hat or scarf, or whatever you like, just use the strands from the top of the tassel to tie them on.  That's it.

So, here is the video.  Happy Tasseling!


Wednesday, May 30, 2012

Yarn Over 101


I decided to do a tutorial on yarn overs, since there can (and is) often times a lot of confusion on the topic. When I first began knitting, I was good with the YO - yarn over.  But then I started seeing things like yon, yrn, yfwd... I didn't quite understand what I was supposed to do.  I thought it was a yarn over, but then again, it seemed different. It must be different, otherwise the pattern would just say YO, right?   As a result, I avoided anything that contained these goofy instructions.  Somewhere along the way, I figured out that these were all yarn overs, and the only difference was yon, yrn, etc. were there to indicate how the yarn was treated, depending on whether the next stitch was a knit or purl.  These days, whenever I see any of these directions, I just make a yarn over and don't even worry if I am going over the needle, around the needle or whatever.  I know my working yarn has to be in the front when I purl, and in the back when I knit, and that my yarn will be going over the needle.  So I just throw the yarn over my needle, place it in the correct position, and make my next stitch.  It really is that simple.

I know a lot of knitters are very passionate about this topic.  For me, as I said above, they are all yarn overs, and I don't get too particular what "kind" of yarn over it is.  I just do it.  I knit to relax, and really don't need to stress over a hole in my knitting.

Here is a printable reference guide on yarn overs, including what to do when you forget to make one and what to do when you make one you don't need.  There is also a video which demonstrates everything on the sheet.  I hope this helps anyone who may be as confused as I was.  Happy Knitting!


Yarn Over 101 Reference Guide


Yarn Over 101 by on Scribd

Friday, May 25, 2012

Natural Stitches


Last weekend I visited a yarn shop called Natural Stitches in Pittsburgh Pa.
I wouldn't consider it a very big store, however it is absolutely full of beautiful yarn!  They also have a cozy little area to sit, relax and knit.  They have a reward program too - spend $250 and receive 10% your next purchase.  Almost one entire wall is devoted to Cascade 220 - they have every single color.  So if you are a fan of that yarn, this is the place to get it!  If you are ever in the area, I highly recommend stopping in. Everyone was very nice, and they were able to help me with yarn for a project I am working on now, and will be sharing with everyone soon.  Below are just a few pictures.  As you can see, it is a very neat, clean and well organized shop.  I can't wait to go back!


Tuesday, May 15, 2012

Entrelac - New tutorial coming soon!

Hi everyone!  I just wanted to take a minute to thank all who stop by and read my little blog.  Also, The Weekly Stitch blog too!  You may not have noticed, but both blogs are now just a .com, instead of the .blogspot.com!

I will soon be posting a tutorial on entrelac knitting.  I will have a free pattern to go along with the tutorial, and a video as well.

I am also working on a couple patterns which will be available for sale in my little area of Craftsy.  I am really excited about these ones!

You can find me on Facebook, Twitter (mainly just for tweeting the new stitch videos) and other places around the web.  I am BibbityBobble over on Ravelry.

I am still doing the podcast - it is now a video which I post to YouTube.

Hope all your knitting adventures are successful.  Come back soon!

Sunday, April 15, 2012

S-n-P Podcast Episode 15

Hi everyone!  It's certainly been quite a while since I did a show.  Now that the weather is warmer, I can sit outside to record.

Here are the things I talk about in this episode, in no particular order

Magazines (you can find links to each of these in the Magazine tab at the top of the blog)
Filati Handknitting - Home
Filati Pocket
The Knitter
Simply Knitting - free gift - wooden purse handles
Knit Today - free gift - some really sheep shaped yarn bobbins
Knitscene

Hobby Lobby Visit
I recently went to Hobby Lobby for the first time.  I loved their selection of knitting books, and while I typically do not knit with acrylic yarn, they did have some nice yarn also.  There were a few I liked, but in the end only got a few skeins of Andes Alpaca by Yarn Bee, in the color Camino.  I have decided to make my first top down shawl with this yarn.  I also got two pairs of rosewood needles - one having an inlay of mother of pearl on the top.  As you all know, I love my Addi Turbo neeldes, but am quickly becoming fond of the rosewood needles!


Autumn Acorn Cowl
This is my latest pattern, which is available for purchase on Craftsy.  This is a quick knit, using Lighthouse Waves yarn featuring the Acorn Cable stitch.  Even if you have never knit cables before, this is an easy stitch.  There is also a video tutorial of the stitch incase you need help with it.  I know the weather is beginning to warm up, and probably the last thing on your mind is making something to keep you warm.  The mornings and evenings are still rather chilly, and a little warmth around your neck can help keep away the chill.  Also, a lot of offices crank up the AC in the summer, and a cowl is nice to help keep the air off your neck.  And of course, if you make it now, you can have it ready to go when autumn/winter returns.

Project Bags
I've told you before about using those nifty little plastic bags that bras and bed sheets come in to take along a small project when you go on a trip, etc.  I recently purchased some sheets which came in a nice little cloth bag.  The extra pillow cases also come in little bags, which are perfect for a small project, needles, a few notions, and a copy of your pattern.  I love these!  They are soft, pretty and just the right size for carrying along where ever you go!  I got mine at Walmart, but I am sure you can find them in any store that sells sheets.

Longer Stitch Videos
You asked, and now you will receive!  An overwhelming majority of you voted to have longer videos demonstrating cable and lace stitches.  I will still be doing the shorter, less complicated stitch videos, but now will also be including longer videos too.  You can find all of the stitch videos over on The Weekly Stitch.

That is going to wrap it up for now.  You can find me on Facebook and Twitter.  Mostly on Facebook, Twitter is just for when I put up a new video or pattern mostly.  Feel free to send any questions, comments or suggestions to sapphiresnpurls at gmail dot com.

Until next time, Happy Knitting!


Wednesday, February 29, 2012

Converting Flat Stitch Patterns for Round Knitting


This is just a little tutorial I put together to help you out if you would like to knit something in the round, but aren't sure how to get the stitch pattern to work out.  I will be perfectly honest - this is not an easy thing for me!  It does take me a little while before I "get it" with some stitch patterns.  So, you are not alone if you aren't able to convert stitch patterns easily.  I do get a thrill when I finally figure out some of the trickier ones, which is what makes me keep trying different patterns.  Practice makes perfect - so don't get discouraged if something doesn't work out the first time.  Keep trying!

Of course I did not come up with this information on my own.  This all can be found in Barbara Walker's Second Treasury of Knitting, as well as various other places on the web.  Also, Margaret Radcliffe has a new book due out in just a few short weeks, called Circular Knitting Workshop: Essential Techniques to Master Knitting in the Round.  I pre-ordered this back in December and have been so anxious to get it, I keep checking to see if maybe it will be released sooner!  This book is supposed to have information on converting stitch patterns for knitting in the round, which is the reason I want it.

Below are instructions along with a few stitches for you to try out to get your needles going if you have never converted flat to round knitting.  You can print this tutorial out so you can have it in your hands - which I find is a lot easier than having to constantly looking at the computer.  There is also a free hat pattern using Star Stitch for you to print out too.  Last but not least, there is a video briefly going over the tutorial and I will show you the stitches given in the tutorial.

I hope this tutorial is helpful, and that you like the hat pattern.  Happy Knitting and Enjoy!

Converting Flat Stitch Patterns for Knitting in the Round


Saturday, February 18, 2012

Quite Contrary Scarf Pattern


I am pleased to offer this lovely scarf pattern for sale over on Craftsy!  Click HERE to go to the pattern.  It is $3.50 to download the pattern.  The scarf is knit with Cascade Ultra Pima, which is a soft, luxurious 100% cotton yarn that comes in a rainbow of beautiful colors.  The color pictured is Periwinkle.

There is also a video to help with some of the techniques used in the scarf you may not be familiar with.


Sunday, February 12, 2012

Pittsburgh 2012 Knit and Crochet Festival

I had a great time yesterday!  So glad I was able to go.  I got some beautiful yarn that I can't wait to use.  I also got two Japanese Stitch books that I have been drooling over for quite some time now.  If you'd like to see pictures of the show and yarn I got, go here to my FaceBook page.  (There are other pictures in this album, for some reason I keep getting an error when I try to move them to the Knitting album)

Monday, February 6, 2012

Lacy Ruffle Scarf


Lacy Ruffle Scarf


Sunday, February 5, 2012

Knitting Ruffles

There are many different types of ruffles that you can add to your knitting in many different ways. I'm just going to cover a few simple ruffles here. If you like ruffles, you may want to check out Knitting on the Edge by Nicky Epstein


First up is the simplest and most basic ruffle. It is just a gentle ruffle - nothing too frilly or over the top.  

All you have to do is cast on twice as many stitches as you plan to use for your main pattern. Knit a few rows - I like the look of a stockinette ruffle, but you can certainly use garter stitch if you like; or experiment with different stitches such as seed stitch.  After a few rows, you will need to decrease. Just work a row of K2tog - or P2tog even. So for instance, if you plan to work with 10 stitches and you've cast on 20, you will be removing 10 stitches on the decrease row and be left with the 10 you need for your project. 


Next is a more ruffly ruffle.  This one simply expands on the above idea. Cast on three times as many stitches as you plan to use for your main pattern, work a few rows, then decrease. You can simply work a row of K3tog or P3tog as the decrease, or you can flex your knitting brain and calculate how to work the decreases over the next two rows instead of just one. Knitting or purling 3 together can be a little tight/tricky, so you may opt for spreading the decreases out over two rows. For instance, let's again say you want to work with 10 stitches. You have 30. You could work the decreases this way: Next row, *K1, K2tog* along the row. This should leave you with 20 stitches. Next row, K2tog across the row, and you should have left the 10 stitches for your main pattern. 


Finally, you can pick up and knit along the edge of a finished piece to make the ruffle. You want to add the ruffle to a finished edge, not live stitches. Ruffles need a nice, firm edge to hold on to. If you add a ruffle to live stitches, the ruffle will spread the fabric out. 

Say you are knitting a scarf and want to add a ruffle to each end after the fact. To make the picking up easier, you may want to use the crochet cast on so that the cast on stitches are clearly defined and easy to pick up. Your standard knitted bind off also created a nice edge easy for picking up and knitting. I'm sure there are other cast ons and bind offs that will give you a nice edge to pick up, but since I typically just use the ho-hum knitted bind off and crochet cast on or long tail, I couldn't give an example of any others. 

In this particular sample, I picked up 14 stitches along my cast on edge, then knit a few rows in stockinette, then increased big time. I knit into the front and back of each stitch in the next row, as well as making a yarn over between each stitch, totaling 42 stitches. I next worked a plain row and then bound off.  This gave me a very ruffly, eyelet edge. 


You can knit the ruffle as long as you like, but the longer it is, it will turn to a flounce as opposed to a ruffle. It's really all a matter of personal taste.  So get out your yarn and needles and start playing. You might like the same method of making a ruffle in one type of yarn but not another.  Experimenting is part of the fun of knitting. 

Here is a video of the ruffles in this post.  Happy Knitting!


Saturday, January 14, 2012

Join a New Ball of Yarn

Yarn is Cascade 220

 How great is this join?!  Simple and easy to do - you can use any yarn, too.  Other than the Spit Splice, or Felted Join, this has to be my favorite method of joining a new ball of yarn.  Rather than still photos, I am just doing the video on this one.  If you haven't tried this yet, you must. You will need a yarn or tapestry needle to do this, and about 30-60 seconds.  That's it.

In the picture above, I used two different colors just for ease of demonstration, but most likely you will be using the same color of yarn.  Even if you are using two different colors, once you've knit the join area, it really blends in well with the fabric and you will be hard pressed to tell where the join is once it is done.

Hope you like it.  Happy Knitting and Enjoy!


Sunday, December 18, 2011

Spiral I-Cord

Sample was knit with Lily Sugar n Cream on US Size 6 needles - 4 stitches


I have been thinking about spiral/curly I-Cord for some time now.  None of the info I found (like HERE) was what I was looking for.  The curl was produced after the length of the cord had been knit - when I bind off, I like that to be the end!  I am not too fond of binding off and still having something left to do (seaming, anyone?).  You can even do a mini version of my Amazing Curly Scarf to make spirals - I believe this is the method in Knitting Over the Edge.  But I didn't want that look either.  So, this morning I got out some yarn and needles, and played around until I came up with this method.  I am not saying I am the first to do it like this, because I am sure someone else out there has done this before me, but I didn't find any instructions for spiral I-Cord during my search that was like this.

It is very simple to do and I willingly admit that I am darn proud of myself for having an idea that actually works!  So, without further ado, here is what I did.  I am assuming that you already know how to make the standard I-Cord by the way.

Cast on 4 stitches - you can use either DPNs or a circular needle

Slide stitches to the other end of the needle as normal and knit all stitches
Row 2 - Knit 2, Slip 1, Knit 1
Row 3 - Knit 2, Slip 1, Knit 1
Row 4 - Knit all stitches

Repeat Row 2 - 4 until cord is the desired length

What to do with the curly I-Cord?  Maybe replace the standard fringe on a scarf with these nifty spirals, or top off a hat.  You can even add beads - I have a tutorial on that too. You are only limited by your imagination.

This is by no means the only way to knit a spiral cord.  I encourage you to play around with different yarns and needle sizes, and even a different number of stitches.  Perhaps add another row or two where the stitch is slipped - heck, slip two stitches.  You may come up with a better curling cord.  If you do alter this "pattern", I would love to see what you come up with!

Here is a brief video of the technique.  Enjoy!


Beaded I-Cord


If you are looking for a way to add some pizzazz to your I-Cord, beads might be the answer you are looking for.  Here are two ways to add beads to your I-Cord.

I suggest pre-stringing the beads, since I-Cord is fiddly enough as it is.  Having the beads on your yarn from the start is more convenient.  Also, if you are following a pattern you will place the beads as directed by the pattern.  Otherwise, put them where you like, as many or as few as you like.  

Method One:

When you reach the point where you would like to have your bead, slide the bead up the yarn and to the needle.  Bring the yarn to the front of the work, and slip the next stitch on the left needle purlwise.  Take the yarn back to the back of the work, and continue knitting.  (I find it helpful if I hold the bead in place with my thumbnail at this point)

Repeat this where ever you would like to place a bead on your I-Cord.

Method Two:

When you reach the stitch where you would like to have a bead, insert the right needle into it, but don't knit it just yet.  Next, slide your bead up the yarn to the needle.  Now, make the knit stitch, pulling the bead through the stitch along with the yarn.  Continue knitting.  On the next row when you get to the stitch with the bead on it, slide the bead up over the needle and to the back of the  stitch.  When you make the new stitch, the bead should pop out to the front of the I-Cord.

Here is a video demonstrating both of these methods.